
Spring Boot Observability with OpenTelemetry: Traces, Metrics, and Logs
When a request fails in a microservices architecture, finding the root cause means correlating logs, traces, and metrics across 5-10 services. Without observability, you are guessing. Spring Boot OpenTelemetry integration provides distributed tracing, metrics collection, and log correlation out of the box. Therefore, this guide shows you how to instrument a Spring Boot application with OpenTelemetry and connect it to Grafana, Jaeger, and Prometheus for full production observability.
The Three Pillars: Traces, Metrics, Logs
Observability rests on three signal types that work together. Traces show the journey of a single request through your system — which services it hit, how long each took, and where it failed. Metrics show aggregate behavior — request rate, error rate, latency percentiles, CPU usage. Logs show detailed events with context. The magic happens when all three are correlated: a spike in error-rate metrics leads you to traces of failed requests, which carry trace IDs that you then search in your logs for detailed error messages.
OpenTelemetry unifies all three under a single standard. Before OpenTelemetry, you needed separate libraries for tracing (Zipkin, Jaeger), metrics (Micrometer, Prometheus client), and logging (SLF4J, Log4j). Moreover, correlating between them required manual trace-ID propagation that broke the moment a new service or thread pool entered the path. OpenTelemetry instead handles instrumentation, collection, and export for all three signals with a single SDK and a vendor-neutral wire format, which is the real reason it has become the industry default rather than yet another agent.
Setting Up OpenTelemetry with Spring Boot
Spring Boot 3.x has excellent OpenTelemetry support through Micrometer and the OpenTelemetry Java agent. The simplest approach is the Java agent, which auto-instruments your application without code changes; the dependency-based approach below gives you tighter control and works better when you also want custom spans.
<!-- pom.xml dependencies -->
<dependency>
    <groupId>io.micrometer</groupId>
    <artifactId>micrometer-tracing-bridge-otel</artifactId>
</dependency>
<dependency>
    <groupId>io.opentelemetry</groupId>
    <artifactId>opentelemetry-exporter-otlp</artifactId>
</dependency>
<dependency>
    <groupId>io.micrometer</groupId>
    <artifactId>micrometer-registry-otlp</artifactId>
</dependency>
# application.yml — OpenTelemetry configuration
management:
tracing:
sampling:
probability: 1.0 # Sample 100% in dev, 10% in production
otlp:
tracing:
endpoint: http://otel-collector:4318/v1/traces
metrics:
export:
enabled: true
step: 30s
url: http://otel-collector:4318/v1/metrics
# Set service name for trace identification
spring:
application:
name: order-service
# Logging with trace correlation
logging:
pattern:
console: "%d{yyyy-MM-dd HH:mm:ss} [%X{traceId}-%X{spanId}] %-5level %logger{36} - %msg%n"The logging pattern includes traceId and spanId from MDC (Mapped Diagnostic Context). OpenTelemetry automatically injects these into every log statement. When you see an error in your logs, you copy the traceId, search for it in Jaeger, and immediately see the complete request flow across all services. Notice also the sampling probability: 100% is fine in development, but in production you almost always lower it — head sampling at the application level keeps cost predictable, while the smarter tail sampling described later keeps the traces that actually matter.
Distributed Tracing: Following Requests Across Services
OpenTelemetry automatically traces HTTP calls, database queries, message-queue operations, and gRPC calls in Spring Boot. Each operation creates a span — a named, timed operation with metadata. Spans nest hierarchically to form a trace that shows the complete request journey.
@RestController
@RequiredArgsConstructor
public class OrderController {

    private final OrderService orderService;
    private final Tracer tracer;  // Inject OpenTelemetry tracer

    @PostMapping("/orders")
    public ResponseEntity<Order> createOrder(@RequestBody OrderRequest request) {
        // Automatic span: "POST /orders" (Spring MVC instrumentation)

        // Custom span for business logic
        Span span = tracer.spanBuilder("validate-order")
            .setAttribute("order.items.count", request.getItems().size())
            .setAttribute("order.customer.id", request.getCustomerId())
            .startSpan();

        try (Scope scope = span.makeCurrent()) {
            Order order = orderService.createOrder(request);

            span.setAttribute("order.id", order.getId());
            span.setAttribute("order.total", order.getTotal().doubleValue());
            span.setStatus(StatusCode.OK);

            return ResponseEntity.ok(order);
        } catch (Exception e) {
            span.setStatus(StatusCode.ERROR, e.getMessage());
            span.recordException(e);
            throw e;
        } finally {
            span.end();
        }
    }
}

@Service
@RequiredArgsConstructor
public class OrderService {

    private final RestClient paymentClient;
    private final JdbcTemplate jdbcTemplate;
    private final KafkaTemplate<String, OrderEvent> kafka;

    @Observed(name = "order.creation")  // Micrometer observation
    public Order createOrder(OrderRequest request) {
        // Span: "SELECT orders..." (JDBC instrumentation)
        Order order = saveOrder(request);

        // Span: "POST payment-service/charge" (HTTP client instrumentation)
        paymentClient.post()
            .uri("/charge")
            .body(new ChargeRequest(order.getTotal()))
            .retrieve()
            .body(ChargeResponse.class);

        // Span: "send order-events" (Kafka instrumentation)
        kafka.send("order-events", order.getId(),
            new OrderEvent("ORDER_CREATED", order));

        return order;
    }
}
The resulting trace in Jaeger shows the HTTP request (150ms total), a nested database query (5ms), an HTTP call to the payment service (80ms, which displays its own nested spans), and a Kafka message send (15ms). If the payment call takes 500ms instead of 80ms, you immediately see the bottleneck. Additionally, you can compare traces from fast and slow requests to identify exactly what differs.
Span Attributes and Context Propagation: The Details That Matter
Auto-instrumentation gives you the skeleton, but well-chosen span attributes turn a trace from “something was slow” into “this specific customer’s oversized cart triggered a slow query.” As a rule, attach high-cardinality identifiers — order ID, customer ID, tenant — as span attributes, never as metric labels, because metrics with unbounded label values will explode your Prometheus cardinality and cost. Conversely, low-cardinality dimensions like payment_method or HTTP status class belong on metrics. Keeping that boundary clear is one of the most common production lessons teams learn the hard way.
Context propagation is the other detail that bites people. OpenTelemetry uses the W3C traceparent header to carry trace context between services, and the instrumented HTTP and Kafka clients add it automatically. However, the moment you hand work to a manually managed thread pool, a @Async method, or a reactive scheduler, the active context can be lost and a child span becomes a new orphan trace. Spring’s ContextPropagatingTaskDecorator and the Micrometer context-propagation library exist precisely to bridge that gap, so wire them in before you trust a trace that crosses thread boundaries.
Metrics: RED Method and Custom Business Metrics
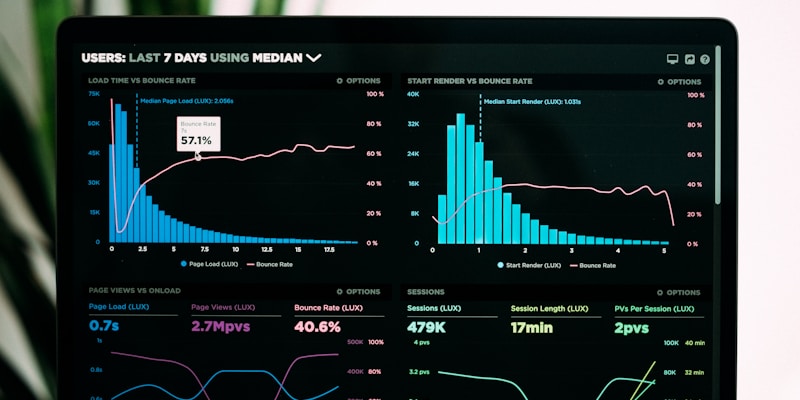
The RED method tracks three metrics for every service: Rate (requests per second), Errors (failed requests per second), and Duration (latency distribution). OpenTelemetry with Micrometer provides these automatically for HTTP endpoints. On top of that, you add custom business metrics for domain-specific monitoring.
@Component
@RequiredArgsConstructor
public class OrderMetrics {

    private final MeterRegistry registry;

    // Counter: track business events
    public void orderCreated(String paymentMethod, BigDecimal amount) {
        registry.counter("orders.created",
            "payment_method", paymentMethod,
            "amount_range", amountRange(amount)
        ).increment();
    }

    // Gauge: track current state
    @Scheduled(fixedRate = 30000)
    public void trackPendingOrders() {
        long pending = orderRepository.countByStatus("PENDING");
        registry.gauge("orders.pending", pending);
    }

    // Timer: track operation duration with percentiles
    public <T> T timeOperation(String name, Supplier<T> operation) {
        return registry.timer("order.operation",
            "operation", name
        ).record(operation);
    }

    // Distribution summary: track value distributions
    public void recordOrderValue(BigDecimal total) {
        registry.summary("order.value",
            "currency", "USD"
        ).record(total.doubleValue());
    }
}
Notice the amount_range label in the counter above: instead of recording the raw amount as a label, the code buckets it into a handful of ranges, which keeps cardinality bounded. For latency, prefer a Timer with percentile histograms enabled so that Prometheus can compute accurate p95 and p99 server-side; a simple average hides exactly the tail latency that frustrates users.
The OpenTelemetry Collector: Central Pipeline
The OpenTelemetry Collector receives telemetry from your applications, processes it (batching, filtering, sampling), and exports it to your backends — Jaeger for traces, Prometheus for metrics, Loki for logs. Running a collector instead of exporting directly from your applications decouples your instrumentation from your backend choices.
# otel-collector-config.yaml
receivers:
  otlp:
    protocols:
      grpc:
        endpoint: 0.0.0.0:4317
      http:
        endpoint: 0.0.0.0:4318

processors:
  batch:
    timeout: 5s
    send_batch_size: 1000
  memory_limiter:
    check_interval: 1s
    limit_mib: 512
  tail_sampling:
    decision_wait: 10s
    policies:
      - name: errors
        type: status_code
        status_code: { status_codes: [ERROR] }
      - name: slow-traces
        type: latency
        latency: { threshold_ms: 1000 }
      - name: default
        type: probabilistic
        probabilistic: { sampling_percentage: 10 }

exporters:
  otlp/jaeger:
    endpoint: jaeger:4317
    tls: { insecure: true }
  prometheus:
    endpoint: 0.0.0.0:8889
  loki:
    endpoint: http://loki:3100/loki/api/v1/push

service:
  pipelines:
    traces:
      receivers: [otlp]
      processors: [memory_limiter, tail_sampling, batch]
      exporters: [otlp/jaeger]
    metrics:
      receivers: [otlp]
      processors: [memory_limiter, batch]
      exporters: [prometheus]
    logs:
      receivers: [otlp]
      processors: [memory_limiter, batch]
      exporters: [loki]
Tail sampling in the collector is especially valuable. Instead of deciding at the application level whether to sample a trace, tail sampling waits until the trace is complete and then keeps all error traces, all slow traces, and a random 10% sample of everything else. Consequently, you never miss important traces while keeping storage costs manageable. Be aware of the operational caveat, though: tail sampling requires that every span of a given trace reach the same collector instance, so a horizontally scaled collector tier needs a load-balancing exporter in front to route by trace ID. Skipping that step quietly fragments traces and undermines the whole strategy.
When NOT to Reach for Full OpenTelemetry, and the Costs Involved
Observability is not free, and pretending otherwise leads to bloated bills and ignored dashboards. For a single small service or a monolith with one database, the OpenTelemetry Collector, Jaeger, Prometheus, and Loki are real infrastructure you now have to run, secure, and pay for; in that situation, simple structured logging plus the metrics Spring Boot Actuator already exposes is often enough. Distributed tracing earns its keep once you have several services calling one another, where a request genuinely fans out and the root cause is rarely in the service that surfaced the error.
There is also an in-application cost. Auto-instrumentation adds CPU and a small per-request latency overhead, and 100% sampling in a high-throughput service can generate gigabytes of trace data per hour. Therefore, the honest default is to sample aggressively, lean on tail sampling to retain the interesting traces, and resist the urge to record every conceivable attribute. Instrument what you will actually look at during an incident, and let the rest stay aggregated in metrics.
Related Reading:
Resources:
In conclusion, Spring Boot OpenTelemetry provides production-grade observability with minimal effort. Auto-instrumentation covers HTTP, database, and messaging operations; Micrometer bridges metrics to the OpenTelemetry format; and log correlation with trace IDs connects the three pillars. Start with auto-instrumentation and the Collector, add custom spans and bounded-cardinality metrics for business logic, sample deliberately to control cost, and build Grafana dashboards that show RED metrics for every service.